
TekMatix Blog & Help Articles
Use the search bar below to look for help articles you need.
How to Manage Tasks Using the Enhanced Task View in Tekmatix
How to Manage Tasks Using the Enhanced Task View in Tekmatix
Managing tasks efficiently is essential for staying organized and productive—especially when working across multiple clients, campaigns, or team members. With Tekmatix’s enhanced Task Management features, you can now track, filter, assign, and automate tasks with ease from a single dashboard.
In this guide, we’ll show you how to get started with the upgraded Tasks List View, how to create and assign tasks, and how to make the most of the advanced filtering and sorting features.
Why This Matters
A cluttered to-do list wastes time and causes missed deadlines. The new Task View in Tekmatix:
Centralizes task management across your team.
Offers bulk actions, automated task creation, and filtering by assignee or due date.
Helps you maintain clear accountability for every task.
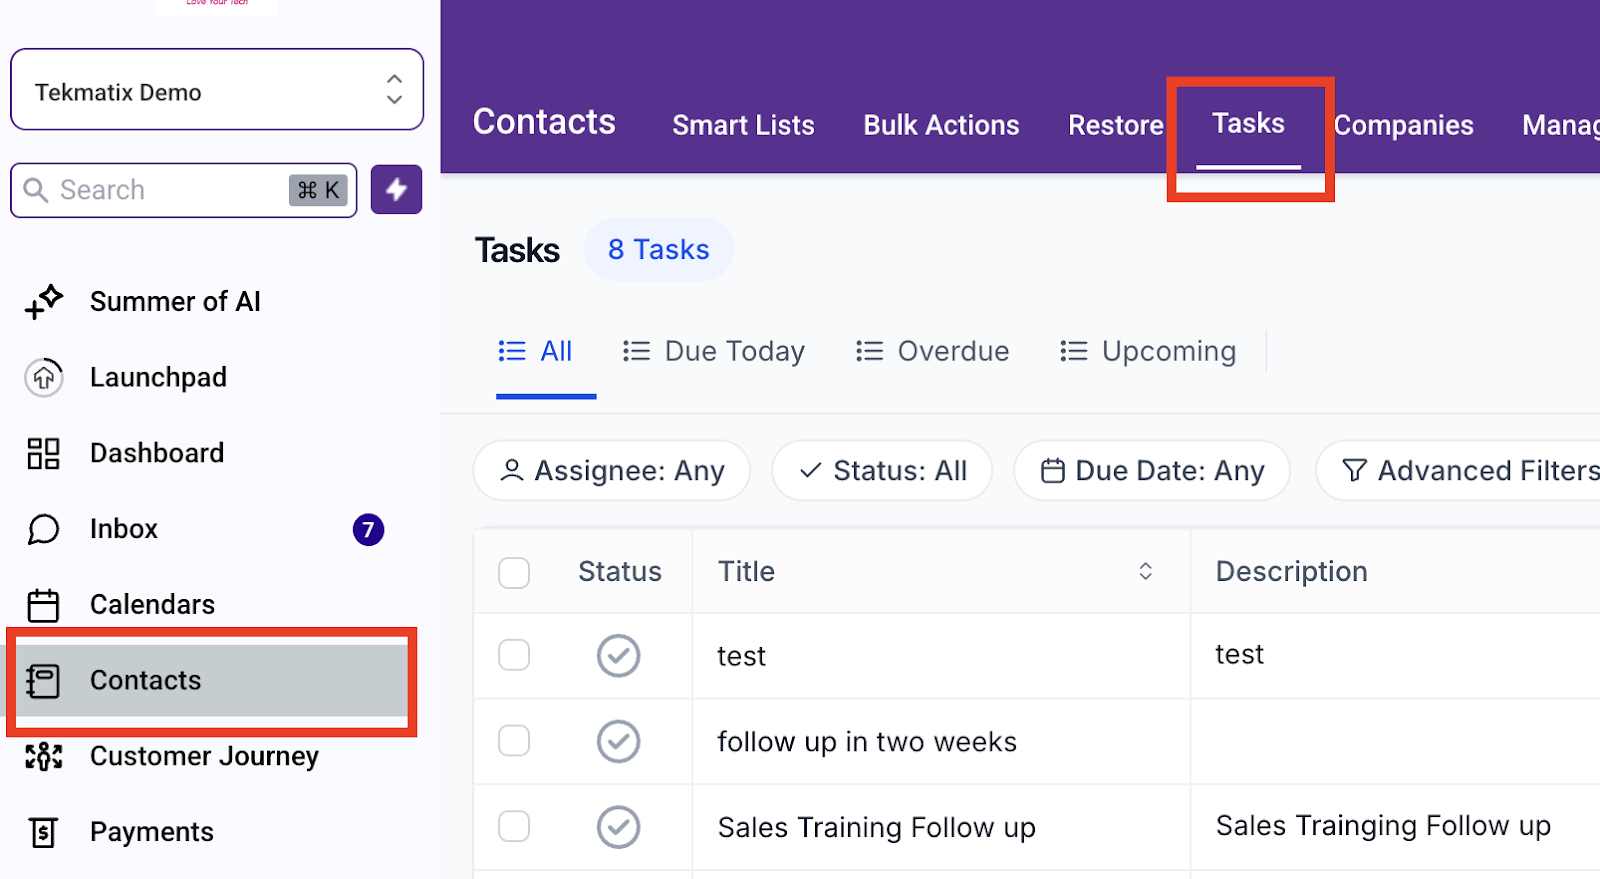
Overview: Where to Find It
Navigation:
From your Tekmatix dashboard, go to:
Contacts → Tasks
You'll see a refreshed task list with filtering, sorting, and bulk action tools across the top.
Step-by-Step: How to Use the Enhanced Task Features
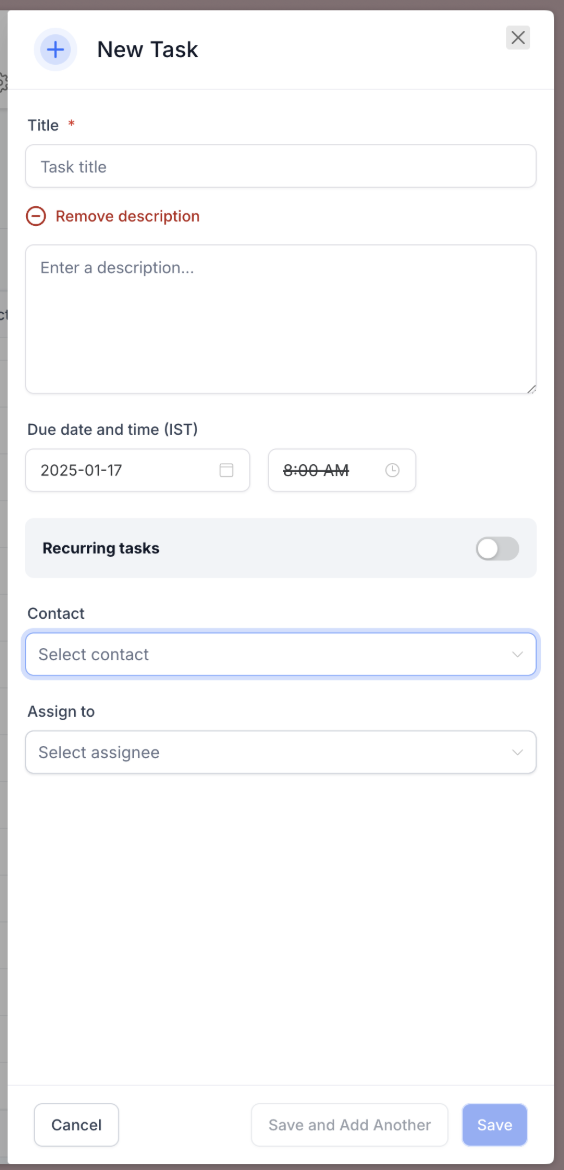
Step 1: Create a New Task
Click + Add Task at the top-right corner.

Fill in the task details:
Title (Required): e.g., "Follow up with lead from webinar"
Description (Optional): Add any key notes or context.
Due Date & Time: Set a deadline.
Recurring Task (Optional): Toggle this on to set repeating intervals.
Contact (Optional): Link it to a specific client or lead.
Assignee (Optional): Assign the task to a team member.
Choose between:
Save (to proceed to the edit view)
Save and Add Another (to continue creating more tasks)
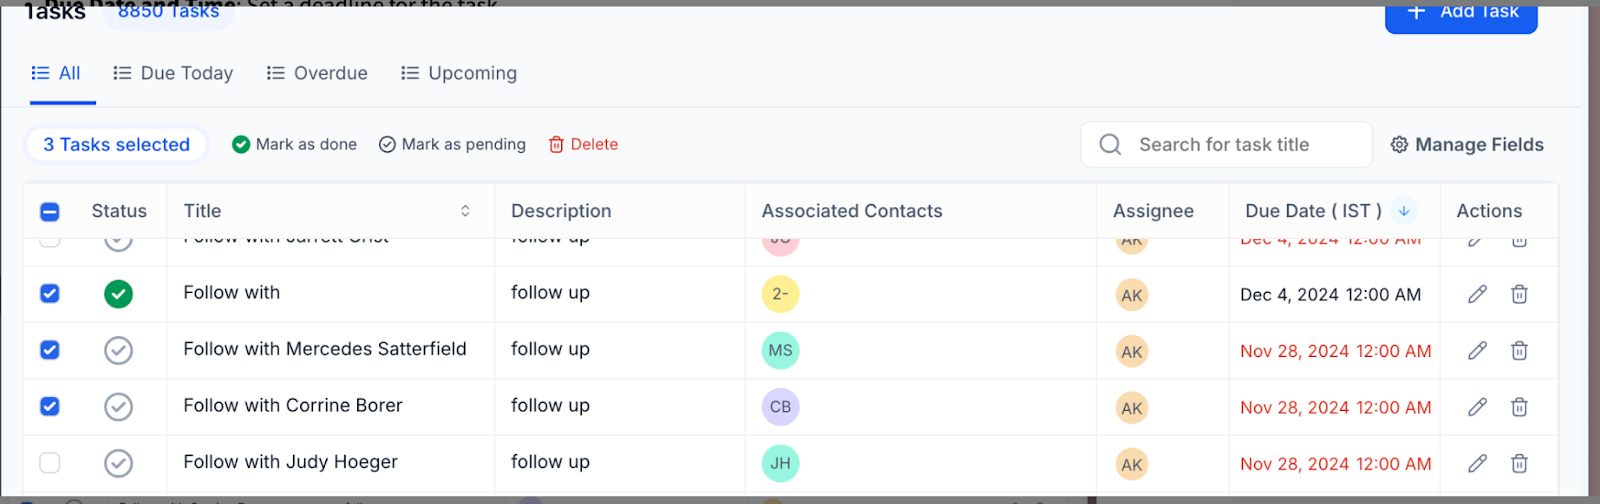
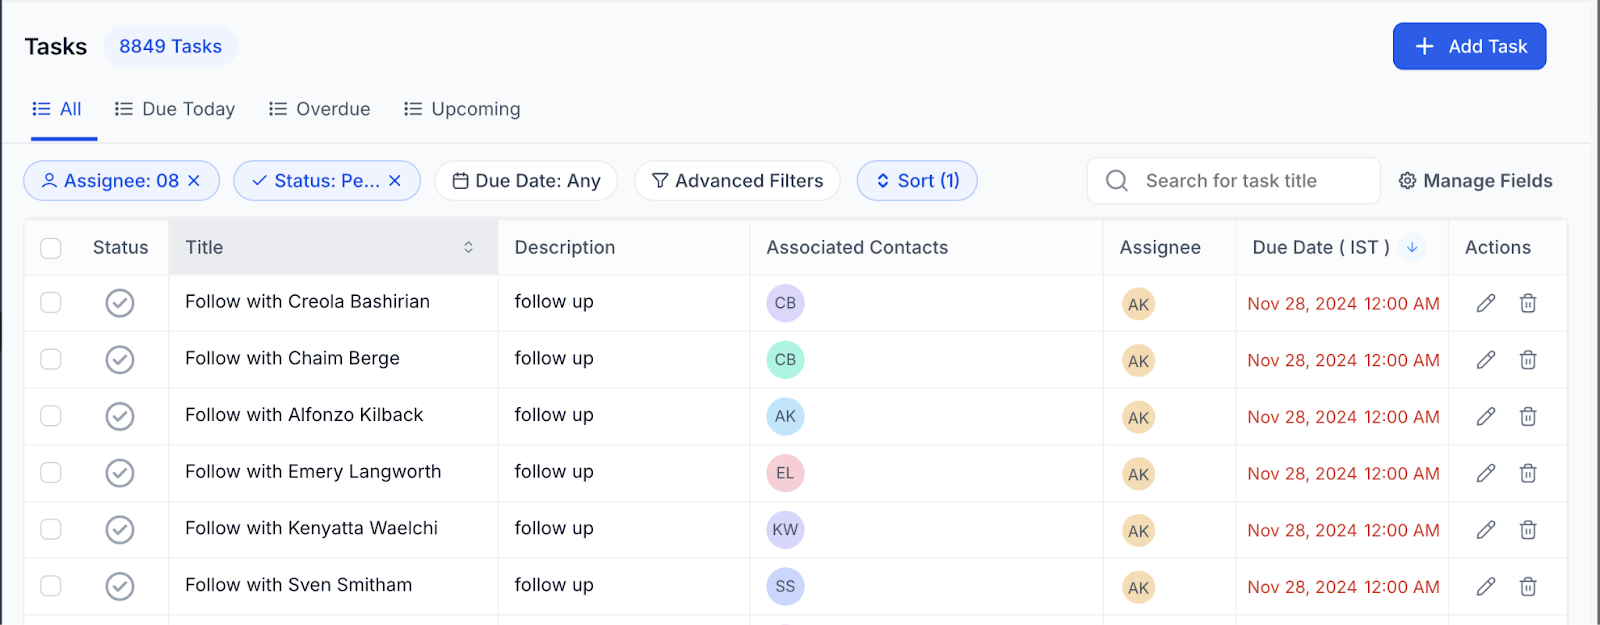
Step 2: Manage Tasks with Bulk Actions
Edit: Click the pencil icon or the task title.
Delete: Select the task → Click Delete. (Deleted tasks can be restored within 60 days.)
Mark as Done: Select multiple tasks → Use bulk actions to complete them in one go.
Step 3: Filter Tasks with Advanced Filters
Click Advanced Filters to narrow your list by:
Assignee
Status: All, Due Today, Overdue, Upcoming
Due Date
Custom Fields: Use any additional data fields you've added to your tasks
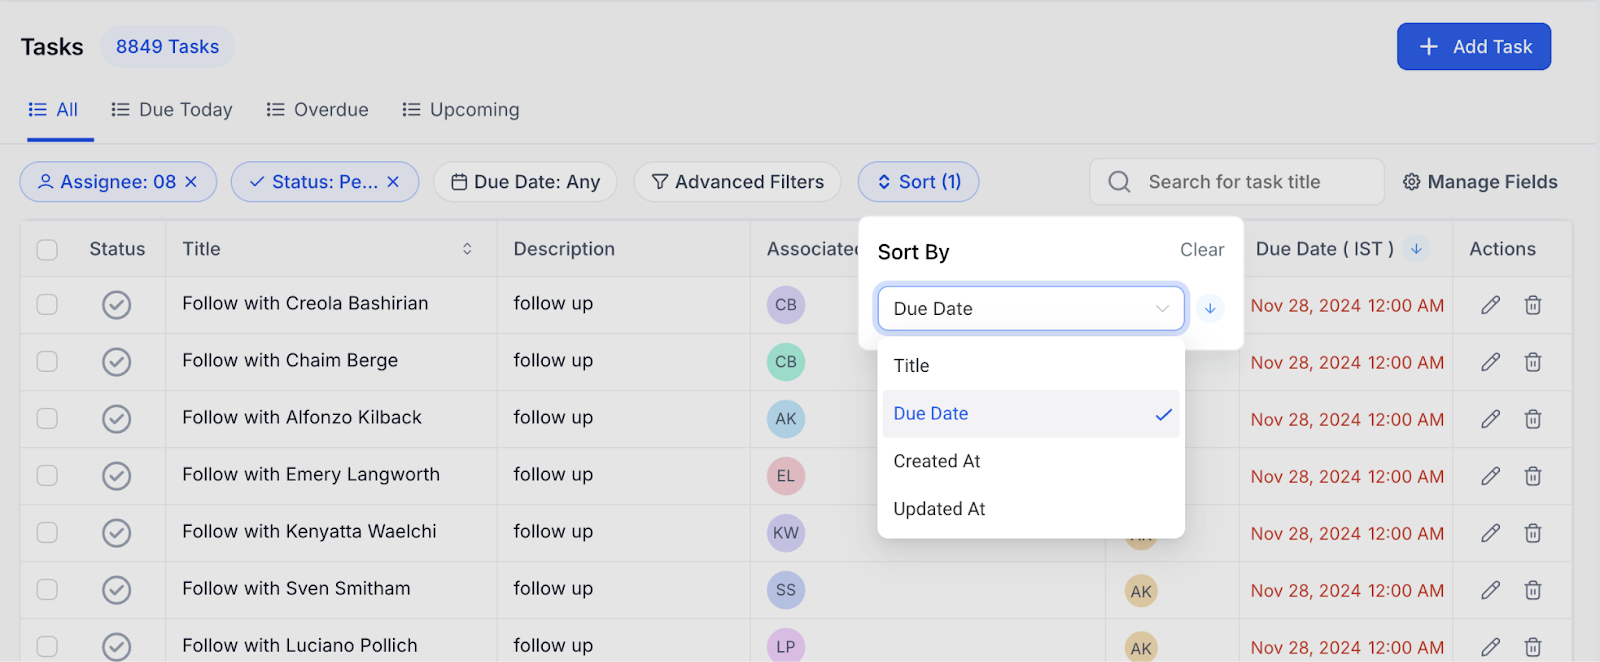
Step 4: Sort Tasks for Better Visibility
Use the Sort dropdown to organize by:
Due Date
Title
Created At
Updated At
Sample Scenario: Using Tasks in a Workflow
Scenario: You want to assign a task to your sales team to call a new lead exactly one day after form submission.
Solution:
In your Workflow, add the “Add Task” action.
Switch the Due In setting to Dynamic Mode.
Enter a custom date/time format like {{contact.custom.date}} 03:00 PM.
This ensures tasks are triggered and scheduled automatically, with precision.
Frequently Asked Questions
Q: Can I recover deleted tasks?
Yes. Deleted tasks can be restored within 2 months.
Q: Can I set task deadlines dynamically inside workflows?
Yes. Use the “Add Task” action in workflows, and switch to Dynamic Mode under Due In to assign specific times using variables.

Copyright © 2026 TekMatix. All rights reserved | [email protected]