

How to do a soil test
Fertiliser is one of the most expensive inputs on any lifestyle farm. If you apply it incorrectly or without understanding what your soil actually needs, you risk wasting money, damaging your soil, or even harming stock. A soil test is the best way to make informed decisions about fertiliser use, pasture management, and long-term soil health.
Why Soil Testing Matters
Without testing, you're just guessing. A good soil test gives you a snapshot of key nutrient levels and soil pH. That means you can apply fertiliser where it's needed and avoid over-application where it's not. Over time, regular testing helps you track changes, fine-tune your approach, and improve your block’s productivity.
Where to Get a Soil Test Kit
Soil test kits are widely available from:
Commercial soil testing laboratories
Fertiliser companies
Rural supply stores like Farmlands or PGG Wrightson
Some veterinary clinics
The kit usually includes a set of plastic sample bags, instructions, and a soil auger which must be returned.
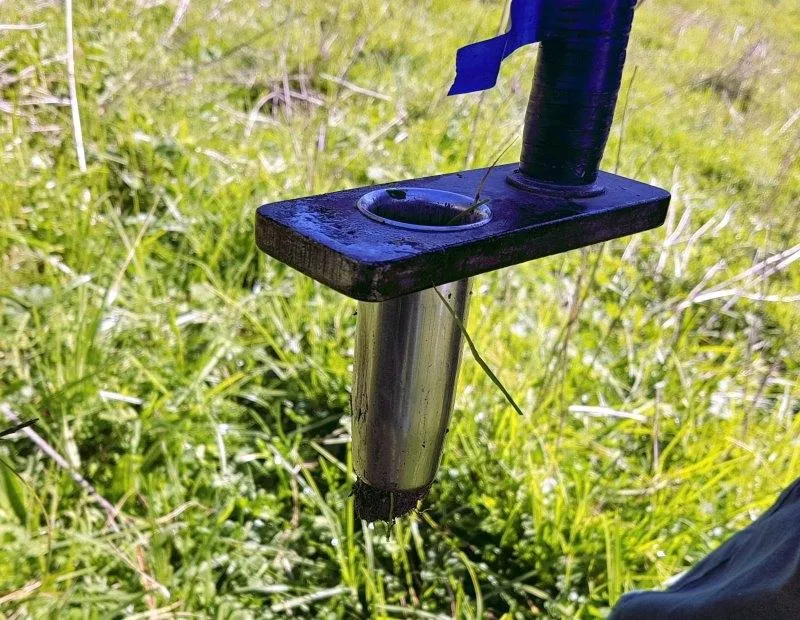
How to Take Soil Samples
Choose the paddocks you want to sample. You don’t have to test every paddock every year – just rotate through your block over time.
To get consistent results, choose and mark a sampling line in each paddock using fence battens or other landmarks. Each year, walk the same line to take your samples.
Follow these key steps:
Take at least 15 cores per sample area, to a depth of 75 mm
Avoid areas near gateways, troughs, stock camps, hedges, and trees
If a paddock has different soil types or slopes, take separate samples for each
If a section has been managed differently, test it separately
Avoid contaminating the sample with dung or debris from your boots
Label each bag clearly with a number and note where it came from. Send the samples to the lab as soon as possible.
When to Sample
Sample in the same month each year, ideally a few weeks before you apply fertiliser. This helps keep your test results comparable over time.
In most cases, testing every 2 to 3 years is sufficient. If you’re making major changes to your pasture or introducing a new stock type, it may be worth testing more frequently for a while.
Understanding the Results
A soil test report will typically include:
Levels of key nutrients (like nitrogen, phosphorus, potassium, magnesium, calcium, and sulphur)
Soil pH
Normal ranges for each nutrient
A visual graph showing where your results sit within those ranges
The report won’t tell you how much fertiliser to apply. For that, you need to take the results to a fertiliser advisor or consultant who can make practical recommendations based on your goals and farm use.
Common Mistakes to Avoid
Over-applying fertiliser is a waste of money and can harm your soil and water quality
Under-sampling or sampling inconsistently makes your results unreliable
Misinterpreting the report without expert advice can lead to poor decisions
Falling for upselling or technical jargon – don’t be afraid to ask for plain English explanations
Make Testing Part of Your Routine
Soil testing is not difficult, and it doesn’t need to be expensive. Once it becomes part of your routine, it will help you get more value from every dollar spent on fertiliser – and avoid unnecessary inputs that your soil may not need.
For more on managing your soil and making the most of your land, get our Soil & Fertiliser ebook.